Jeans & Slippers Creations

Sunday, March 30, 2014

Masking

Hi there!

Did I make you curious?  You're probably wondering what I'm talking about, right?  Well, I'm pretty sure all you crafters out there know!

I haven't created with "masking" for quite awhile... and it took me a few tries to get the look I wanted... experimenting with different stamps and inks.

This card was submitted at Soul Scrappers for their Card Challenge - Masking (CC26).  You can see the challenge here.
What better way to get ready for Easter than making cards!

Supplies used:
Paper: gcd Studios, White Cardstock
Bunny Stamp: Hampton Art
Sentiment & Easter Egg Stamps
Various Inks
Gems
Ribbon


Gems were added in each flower on this strip of pp.

I used the technique with the eggs as well as the bunny stamp... tucking her behind the Easter eggs.  I used different stamps for each egg.  A tiny bow was added on the cute little bunny.

Maybe you will want to give this masking technique a try too!  It's fun, really!  :)

Thanks so much for stopping by!


Saturday, March 29, 2014

Nurture

Hello,

One more layout to share that was also submitted at Turtle Soup for their Thursday Scraplift (3/20) Challenge.  You can see more info here.

The beautiful sketch by Bev:
Image

And here's my layout titled, "Nurture" which is easily confused with "Nature."  :)
This bleeding heart plant was given to me by a friend.  I can't believe how much it has thrived these past few years!  They're so beautiful!

Supplies used:
Paper: My Mind's Eye
Corner Rounder
Martha Stewart Border Punch
Fiskars Border Punch
Ribbon
Fabric Tag & Sentiment
3D Embellie: K&Co.

Just over the ribbon I added this beautiful fabric tag and then the gorgeous 3D embellie!

The ribbon was adhered pretty much as it fell on the page.  I didn't have to tweak it much!  :)
Three glitter gems were added on the small rectangle below the embellies.


More glitter embellies (which are hard to see... but they are there) above the page title.

And three more glitter gems in the upper right of my page.

Thanks so much for stopping by!


Enjoy Camping

Hello!

It's a beautiful start to Saturday... because the SUN is shining!
Not too happy about being woke up at 6 AM though... especially when I LOVE to sleep in on Saturday mornings!  But the dogs had to go out!

I have a layout to share that was submitted at Turtle Soup for their March Mini Crop - Friends Challenge.  You can see the info here.

A fun challenge using the following:
1. Lace and/or punched edges
2. Layers
3. Photo(s) of friends

This is what I created:
The four of us after our Troop won the Spring Camporee Award!  Wow, were the boys stoked!  It was so cool... and they worked very hard and deserved it!  :)

I used:
1. Punched edges
2. Layers
3. Photo of friends

Supplies used:
Paper: gcd Studios, DCWV, Colorbok
SU Border Punch
Fiskars Border Punch
All die cuts: Cut from pp
Sketch: Page Maps (Apr 2013)

The page title was cut from pp and matted on cardstock.  This cute little squirrel was also cut from pp and adhered on the body only... so I could curl the tail away from the page a bit... for dimension.

More fussy cutting!

All these die cuts were cut from pp!  So easy when you have fabulous pp!


Thanks so much for stopping by!


Thursday, March 27, 2014

Friends Card

Hello!

I can always send a "friend" card to one of my special friends... so this card was fun to make!

I submitted it at Turtle Soup for their March Mini Crop - Friends Card Challenge.  You can see the info. here.

The beautiful sketch by Bev:
Image

Here's my card:
Flowers were added around the sentiment sticker.  The glitter gems and single rows of bling are home made.

Supplies used:
Paper: My Mind's Eye, White Cardstock
EK Success Border Punch
Clear Sticker Sentiment
Flowers
Bling: Home Made

A closer look at a portion of my card.

Hope you enjoyed your visit and will stop by again!


Achievement

Hello!

It's been quite awhile since I created a B&W layout... so this was fun!
My page was submitted at Turtle Soup for their March Mini Crop - Recipe Challenge.  You can see all the info. here.

The awesome sketch by Bev:
Image

The Recipe:
M - Use a manufacturer name that starts with "M"
A - Use an "A" in your title somewhere
R - Use Ribbon
C - Use at least 2 circles
H - Use at least 1 heart

And here's my layout titled, "Achievement."
Our daughter after her Basic Training graduation several years ago.  What a special day!

I used everything for the recipe:
M = My Mind's Eye Manufacturer
A = Page Title begins with "A"
R = Ribbon - Below the photo and on the tag
C = 2 Circles - Buttons and Brads
H = 1 Heart - On the metal tag

Supplies used:
Paper: My Mind's Eye, Colorbok
String Pearls
Buttons, Brads, Metal Tag, B&W Ribbon: Close to My Heart
Flowers
Ribbon
Cuttlebug Embossing Folder
Stick Pin
Letter Stickers
Heart Gem

Just below the page title I added tiny black flowers and a button.

String pearls were looped above the photo.

A closer look...

In the upper left I added these cool corduroy brads.

The small tag was embossed and a small metal tag added on it.  I added a stick pin on the white tag and a button.  The only red on my layout is the red gem heart.

I had just enough of this beautiful wide ribbon to loop beneath the photo.

Another look at this cute little cluster.

Thanks so much for stopping by!


Simply Delightful

Hi there!

We're closer to Friday!  Woo hoo!  Finally... no where to go... no paperwork to fill out... just me... doing what I want!  :)

Here's a "Green" layout that was submitted at Turtle Soup for their March Mini Crop - Seeing Green Challenge.  You can see it here.

The sketch:
Image

And this is my "Simply Delightful" layout:
Zoe and I going for our daily walk... Which was long before all the snow came!

As you can see, I used LOTS of green!

Supplies used:
Paper: The Paper Studio
Cuttlebug Embossing Folder
Darice Embossing Folder
Decorative Leaf
Flowers/Branches
Gems: Home Made
Stickers: Creative Memories
Banner Punch
EK Success Border Punch

Another great find in my stash... this cool decorative leaf!  Love it when I find stuff like this... just waiting for me to "find" them!  :)
After adhering the "branches" which is the "stems" from a bouquet of flowers, I added flowers on and around them.

The punched border was distressed a bit.  On the folder tab I added another tab sticker which says, "Happy."  A cardstock arrow was placed to the left of the photo.

So happy to have this tiny banner punch!  Now if I can just remember to use it!!  And... I need to get a triangle punch too!  Each of the pieces were embossed.

I also embossed the large banner... and added the page title sticker.

A couple more photos giving you a closer look at the flowers, cool leaf and branches.


Thanks so much for stopping by!


Wednesday, March 26, 2014

Adventure Is Anywhere You Choose!

Hello,

I have a 2-page layout to share with you today that was submitted at Turtle Soup for their February Project 12 Challenge.  You can see the challenge here.

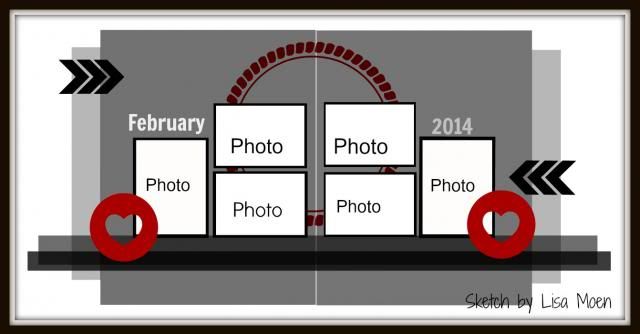
The fun sketch:
Image


And here's my layout titled, "Adventure Is Anywhere You Choose!"
Fun times walking and exploring in the endless woods and fields at my step dad's quite a few years ago.

Supplies used:
Paper: gcd Studios
Stickers: Echo Park
Various Stickers
Twine
Burlap

I layered two rows of twine/burlap below the photos and added die cuts and stickers.

I didn't have a photo to fit this size... so I decided to make it into the page title, cutting cardstock the same size as the photo below it... and add various stickers around the title.

More stickers and die cuts on the right side too.

A closer look...

More arrows were added in the upper left of my page.

Hope you enjoyed my layout!
Have a great day!  :)